Installing a self-signed certificate on an iOS device
For the purpose of this tutorial, I used an iPhone running iOS 13.
Let’s mitm.it
On the phone or tablet, open a web browser and go to the following url :
http://mitm.it
If the network settings are properly set on your device, you should land on a page looking like this one :
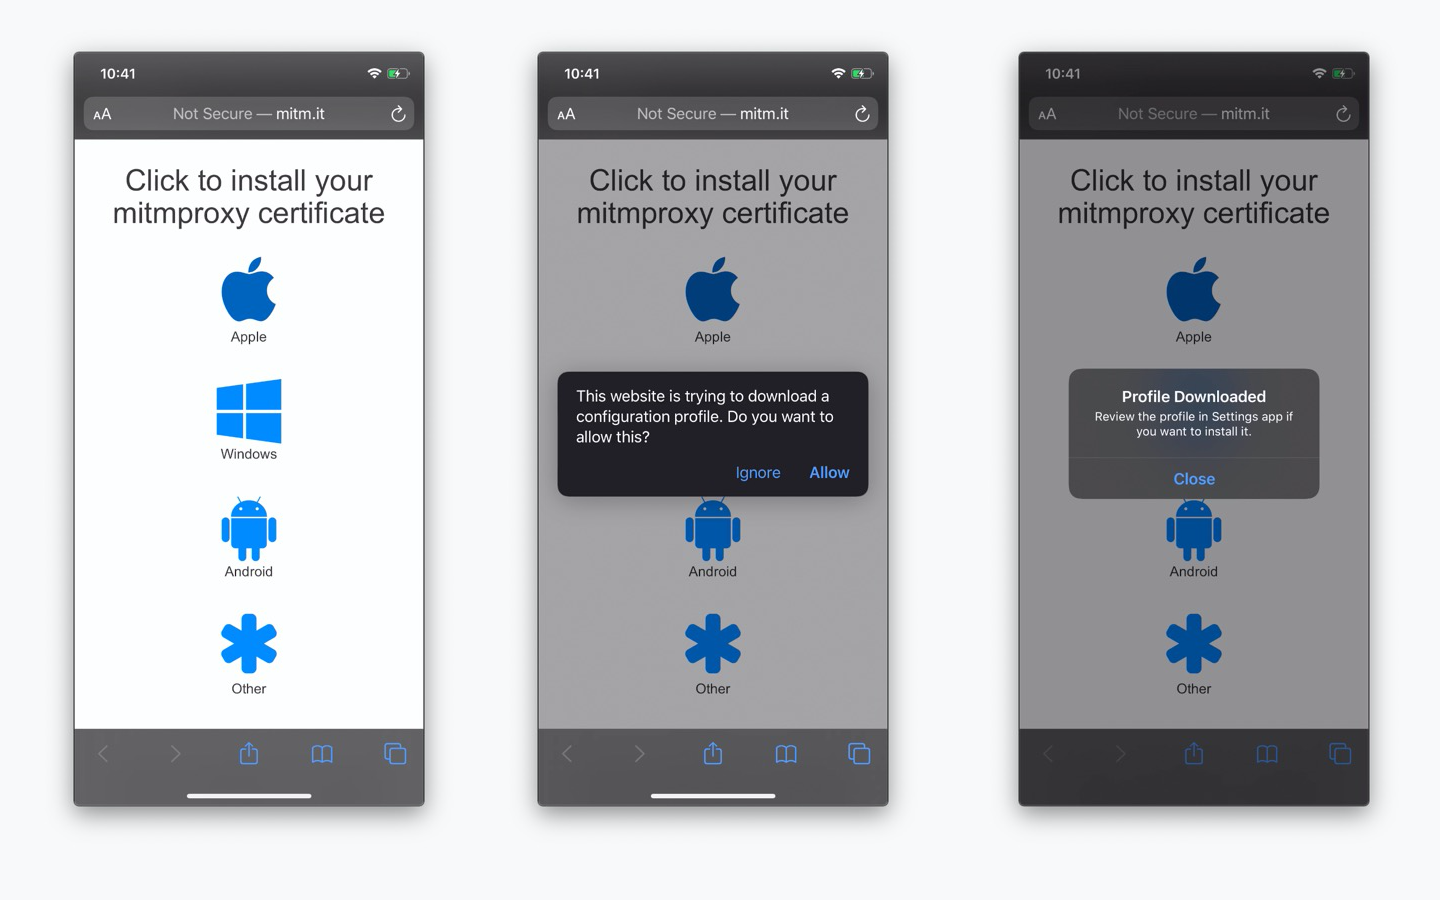
Hit the Apple logo in order to download the mitmproxy certificate. An alert should appear, saying that you are about to download a configuration profile : hit Allow.
Another alert will confirm that the profile has been downloaded and that you need to review it before installing it.
Installing the profile
Go to Settings, on the main screen you should see a new entry named Profile Downloaded.
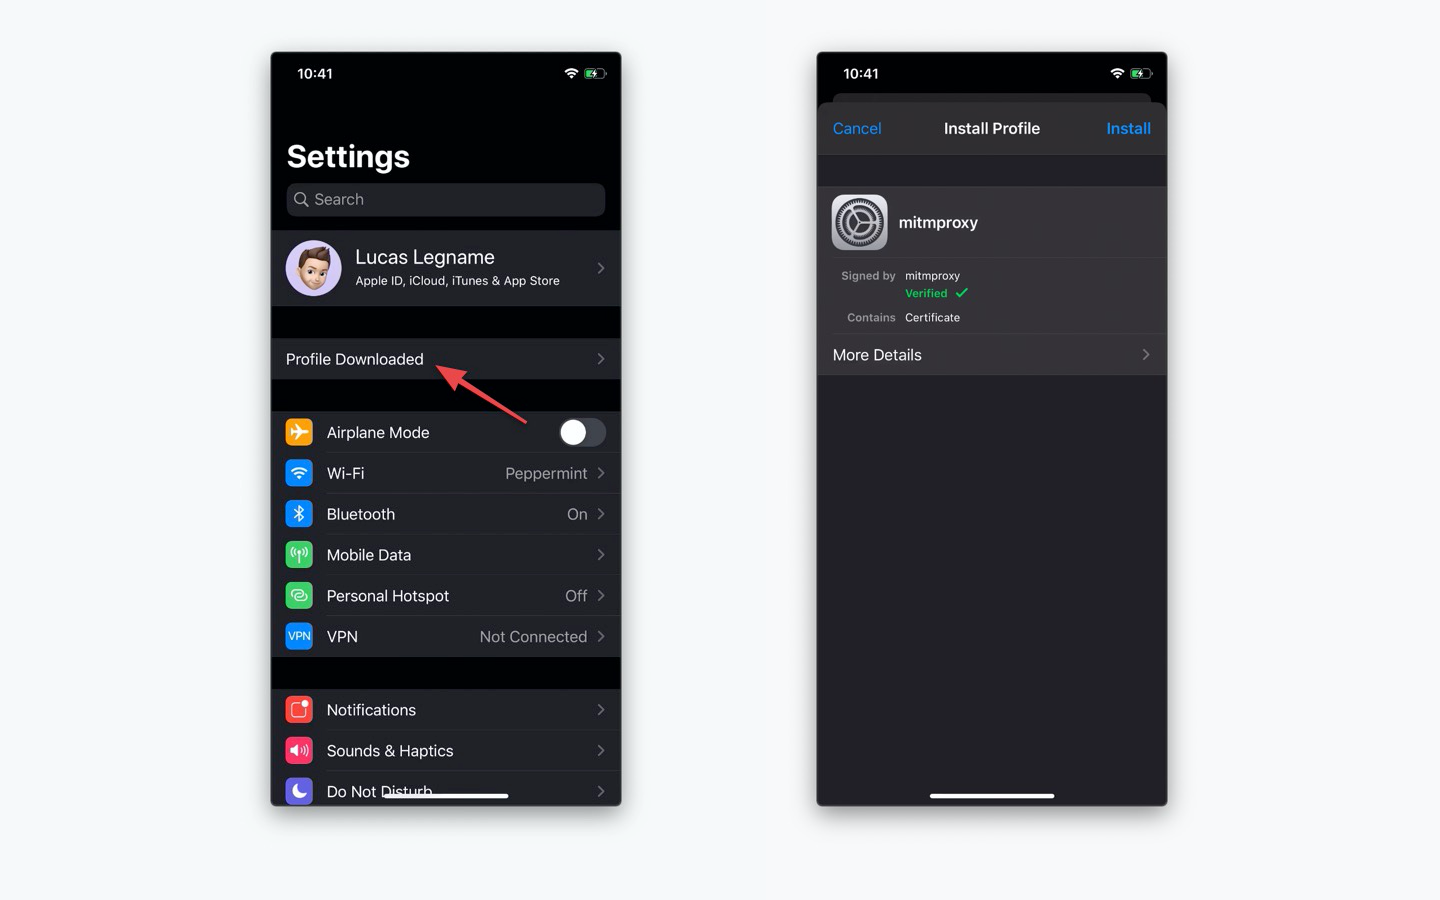
Open it and a modal allowing you to install the configuration profile (containing the mitmproxy certificate) should appear : hit Install. iOS will ask for you password and then you will have to hit Install once again.
Enabling the certificate
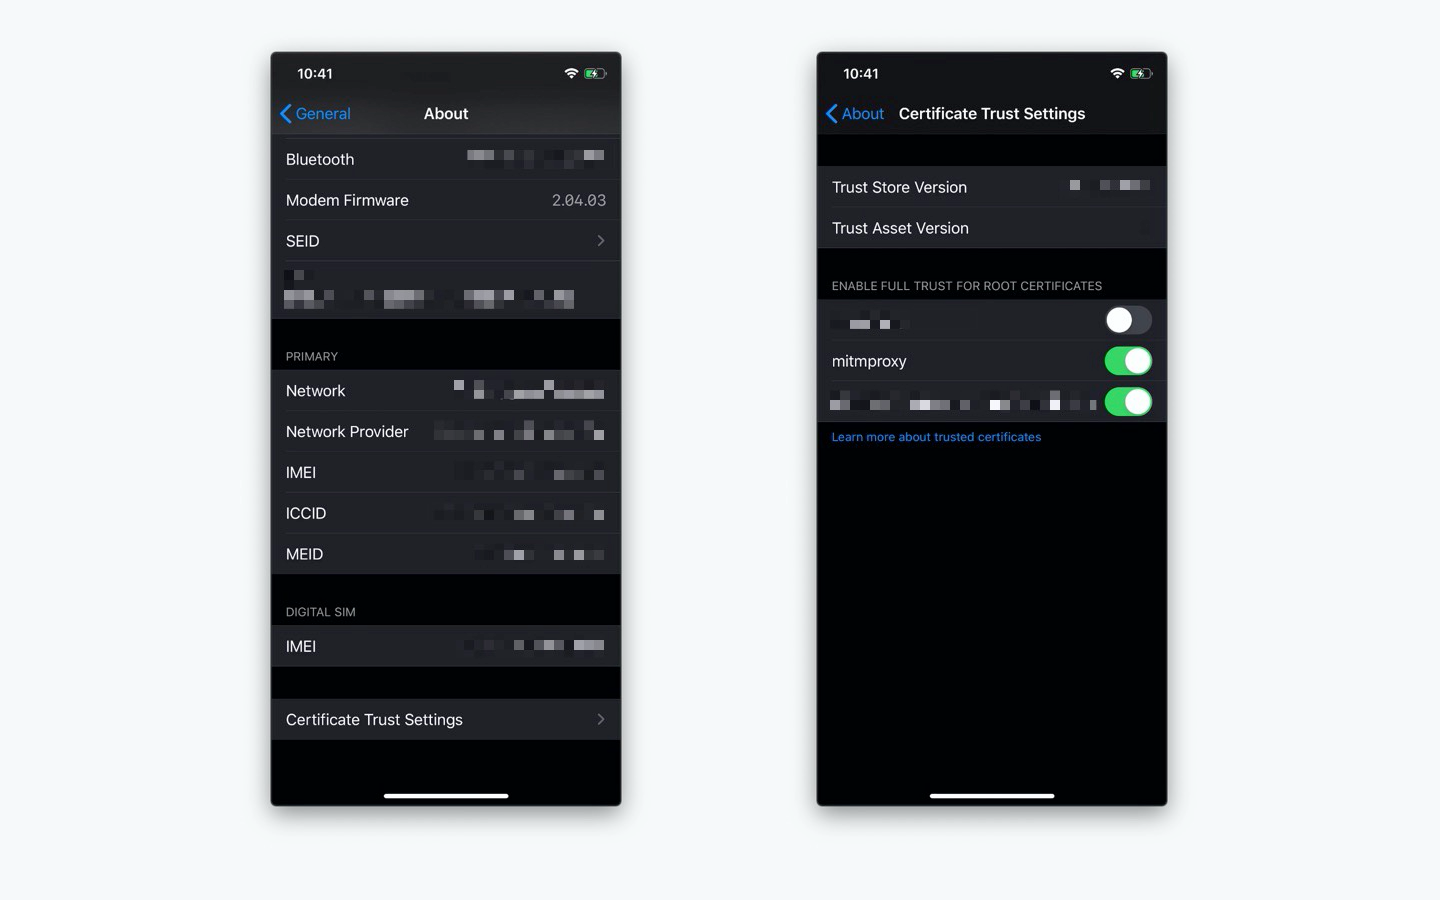
Last but not least, you need to enable the mitmproxy certificate. First, go to Settings > General > About.
Now, at the bottom of the list, hit Certificate Trust Settings and enable the mitmproxy certificate.
That’s it! The mitmproxy certificate is now installed on your device : let’s go back to the main tutorial and try catching a few requests.