Installing a self-signed certificate on a tvOS device
For the purpose of this tutorial, I used an Apple TV 4K running tvOS 13.
Locating the mitmproxy certificate
Depending on how you installed mitmproxy on your computer, the certificate folder should be either ~/.mitmproxy or the local folder you passed as parameter in the Docker command.
Once you found the folder, locate the mitmproxy-ca-cert.cer file among the multiple certificate files. If it is not there, then try starting mitmproxy and check once again.
Uploading the certificate
We now need to send the certificate to your Apple TV. To do so, we first need to host it somewhere.
You can use Dropbox for example : send the file in the cloud and get the download link. You should get something looking like this :
https://www.dropbox.com/s/ppldnxk2531p4ze/mitmproxy-ca-cert.cer?dl=0
Just replace the ?dl=0 with ?dl=1 and you get a link totally usable by your device.
Installing the certificate
Go to Settings > General > Privacy, select Share Apple TV Analytics and hit the PLAY button on the remote.
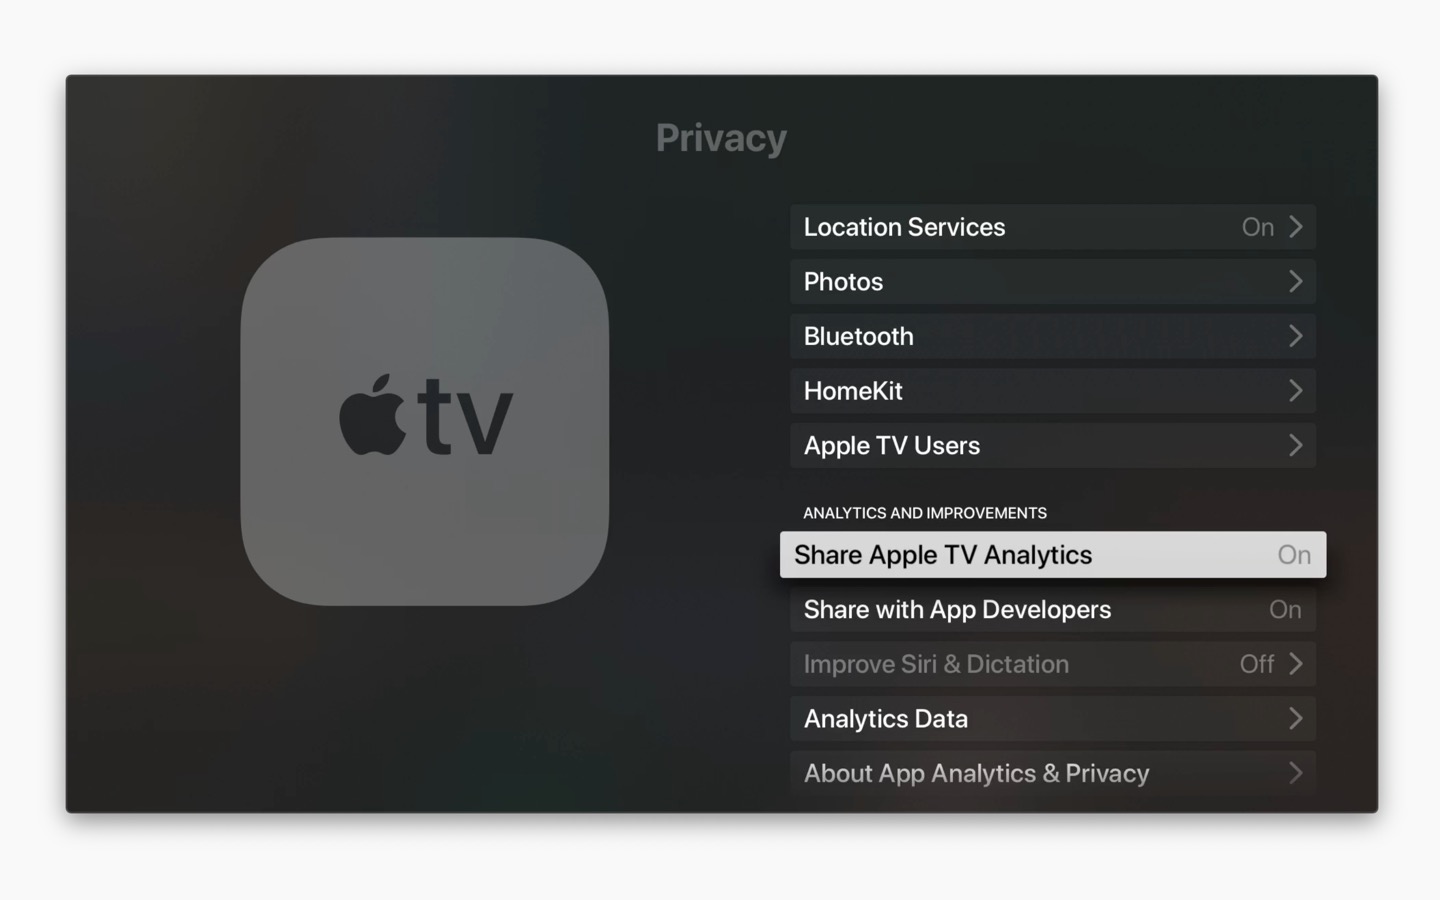
You should be in the Profiles hidden menu. From there, click on Add Profile and enter the url from your hosted certificate.
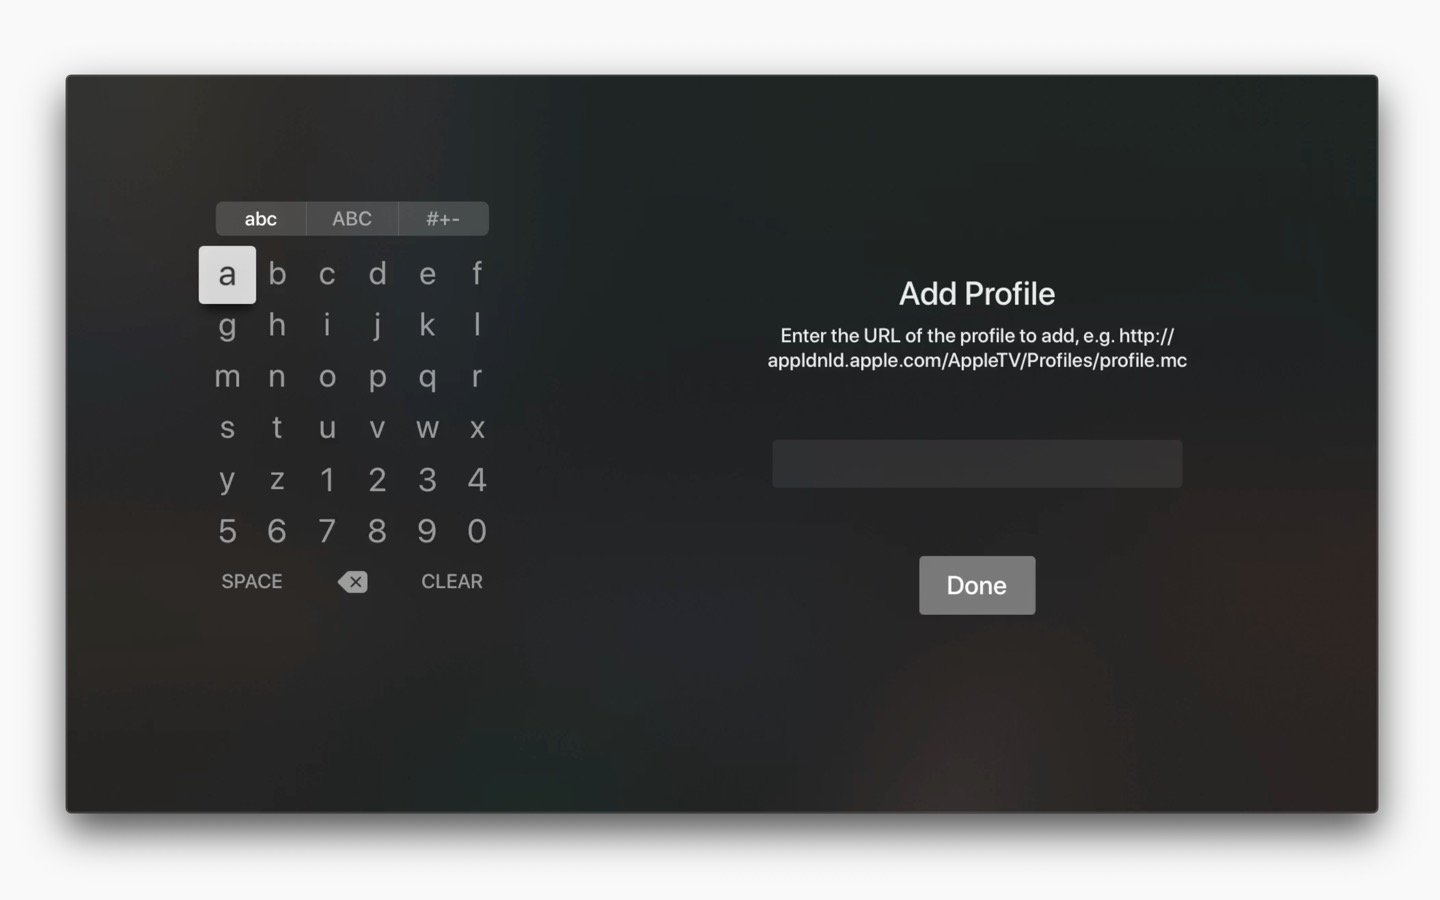
Once you are done, hit Done and the certificate should be added to your Apple TV.
Enabling the certificate
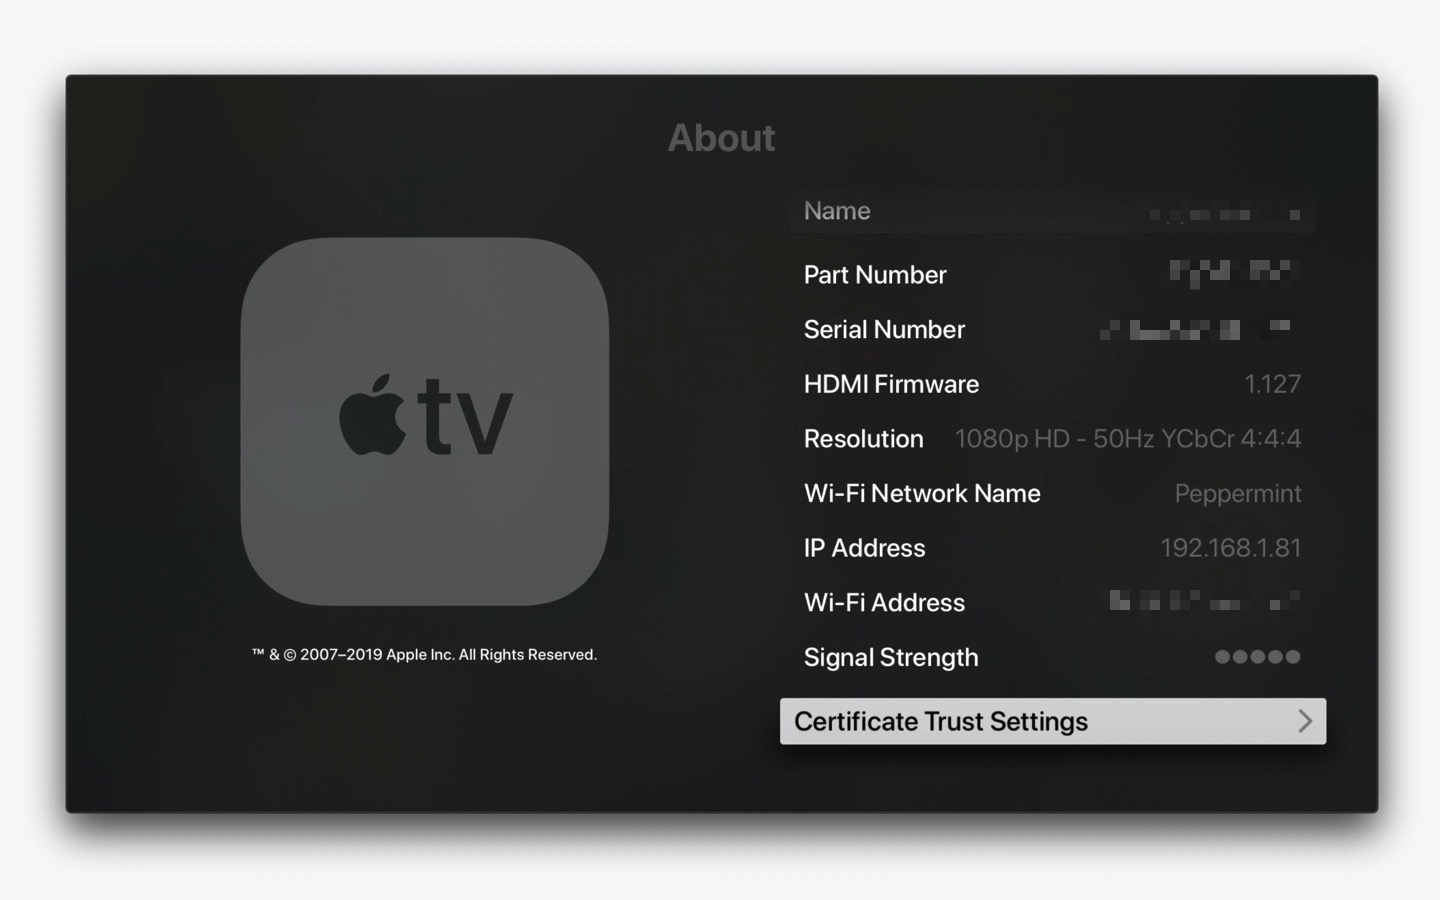
Last but not least, you need to enable the mitmproxy certificate. First, go to Settings > General > About, select the Certificate Trust Settings sub-menu and hit OK.
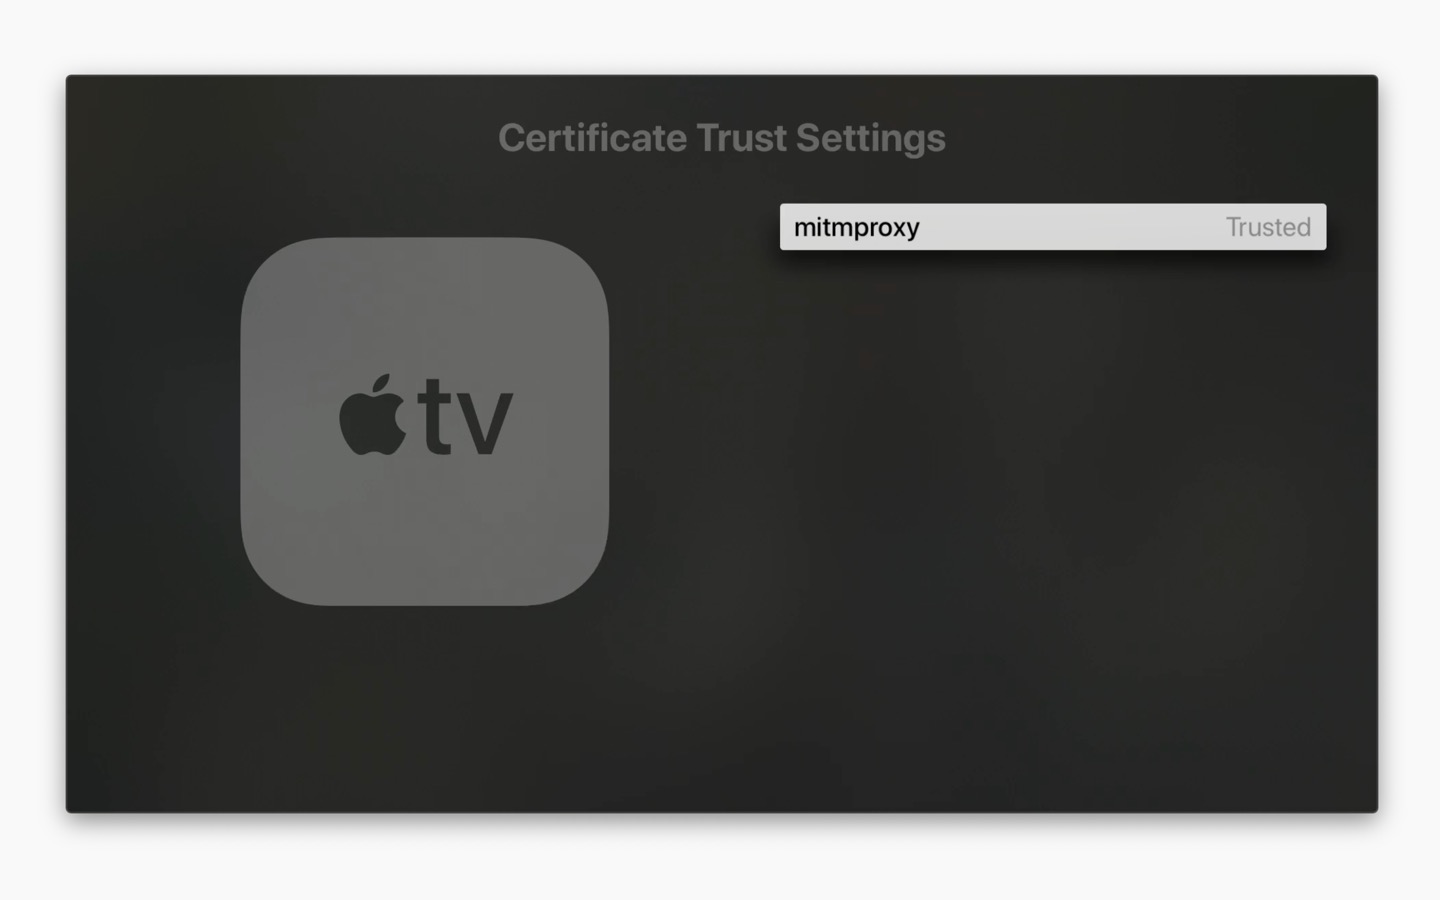
Here you should see your freshly added mitmproxy certificate. To trust it, just select the certificate, click OK then Continue. Once tvOS mentions Trusted next to the certificate, you are good.
That’s it! The mitmproxy certificate is now installed on your device : let’s go back to the main tutorial and try catching a few requests.