Useful tips for mitmproxy
In my previous post, I focused on steps to install mitmproxy and set up your target device. Now that you are all set, here are a few tips to help you getting quickly confortable with this tool.
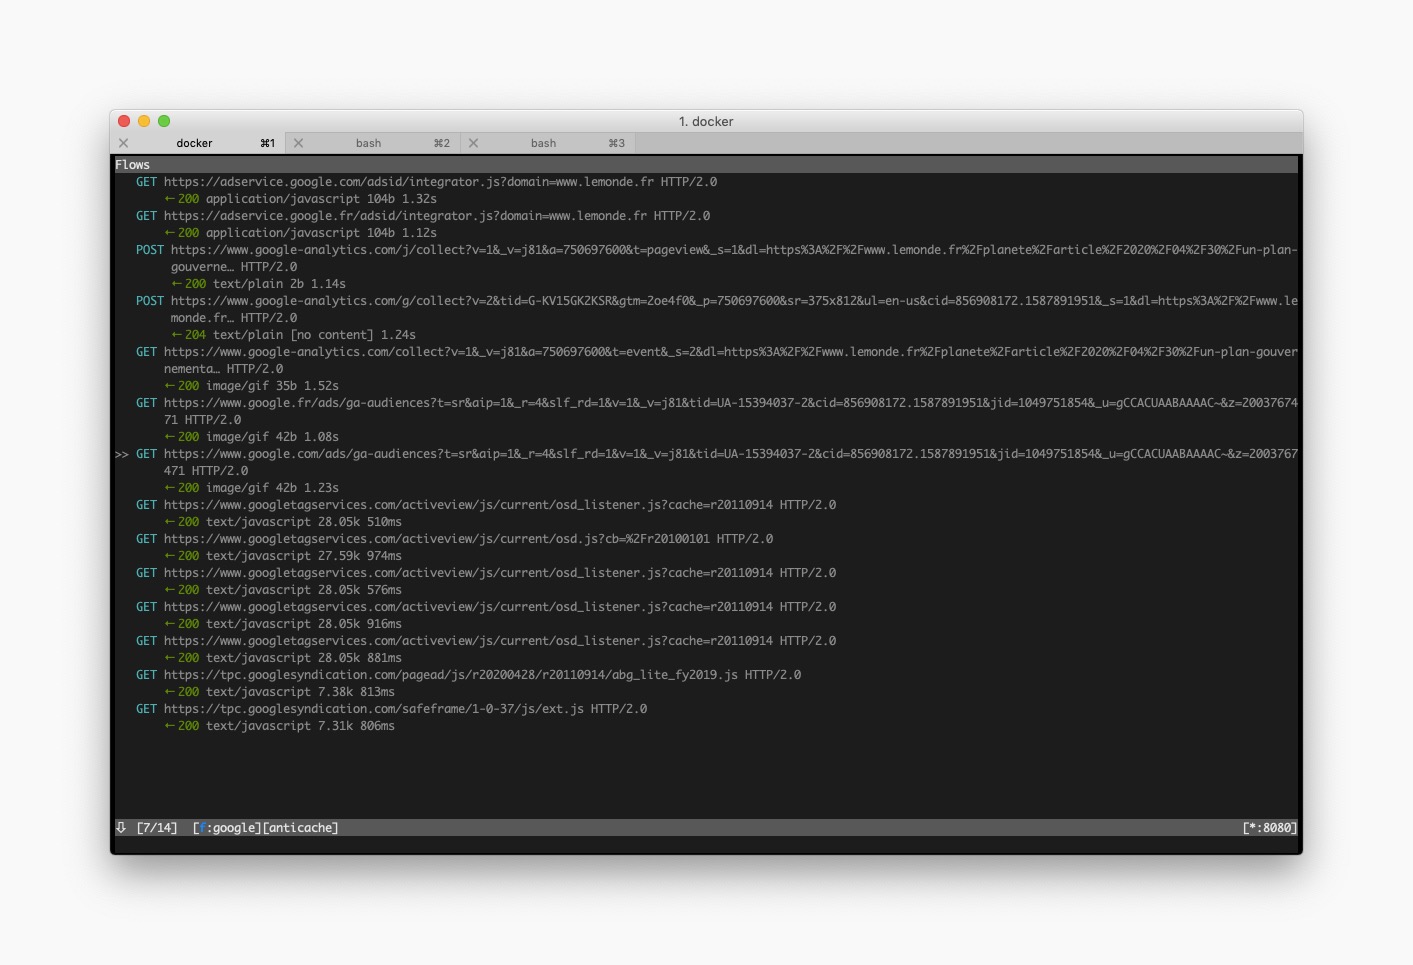
The table and details views
mitmproxy starts on the “table view”, that’s where the requests appear. To navigate among requests, you can use the up and down keys. Select a line and hit enter to see details from any request.
When using an app, this view can quickly become crowded. In this case, you can use the following commands to reduce the number of displayed requests :
- use d to remove a single request
- use z to clear the list
The “request details view” is divided into three tabs (Request, Response and Detail), you can use the tab key to switch between tabs.
This view allows you to see the header and body from any request or response. You can also see details about the web-server that responded.
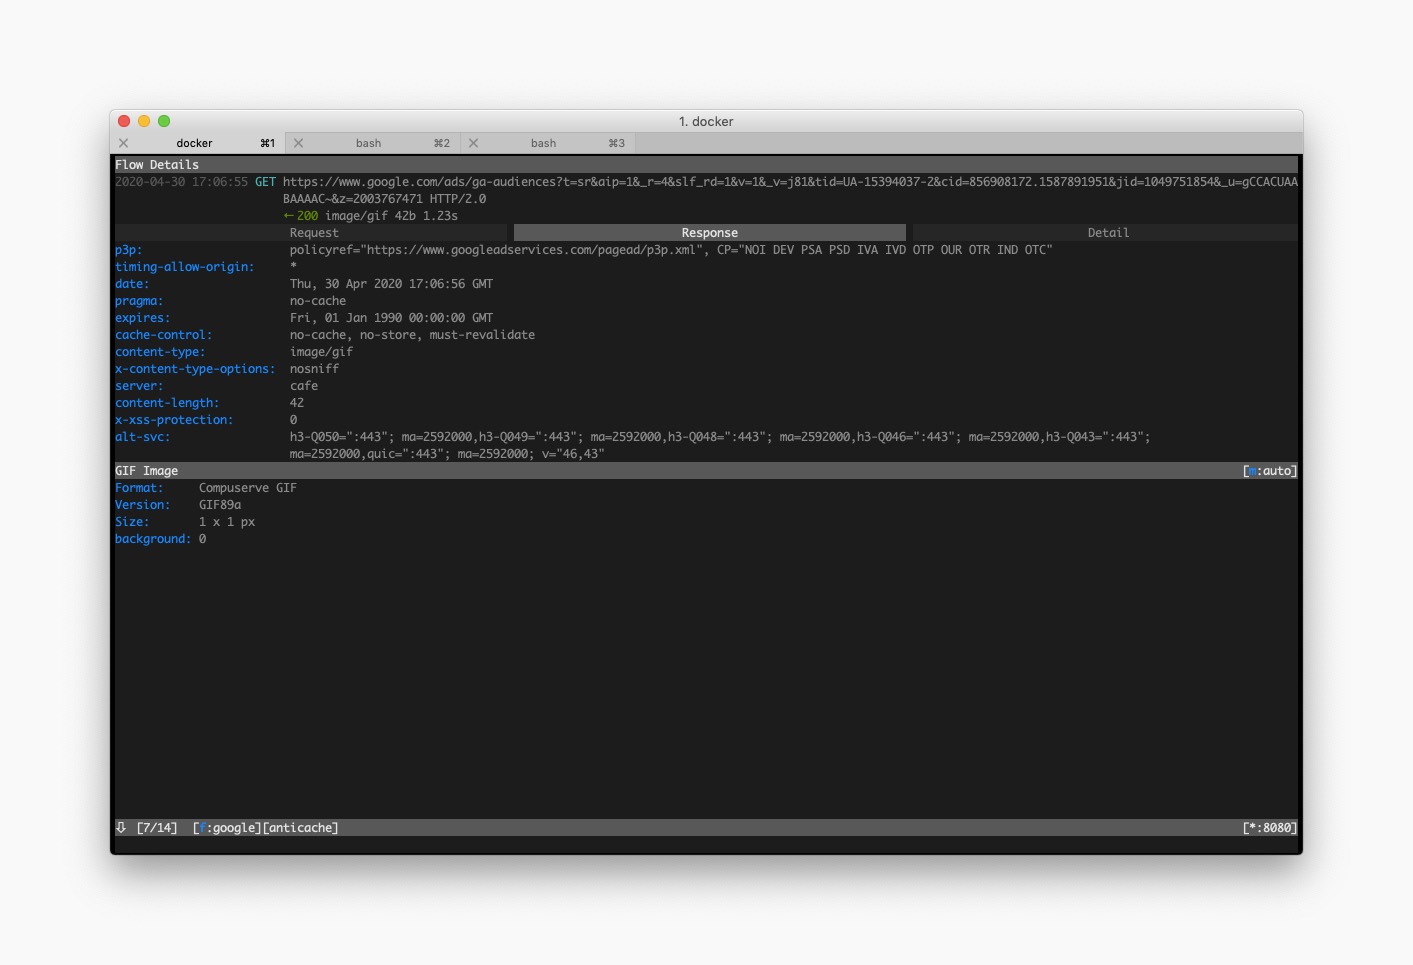
You can navigate between requests directly from the “request details view” : hit space to go to the next request and p to go to the previous one.
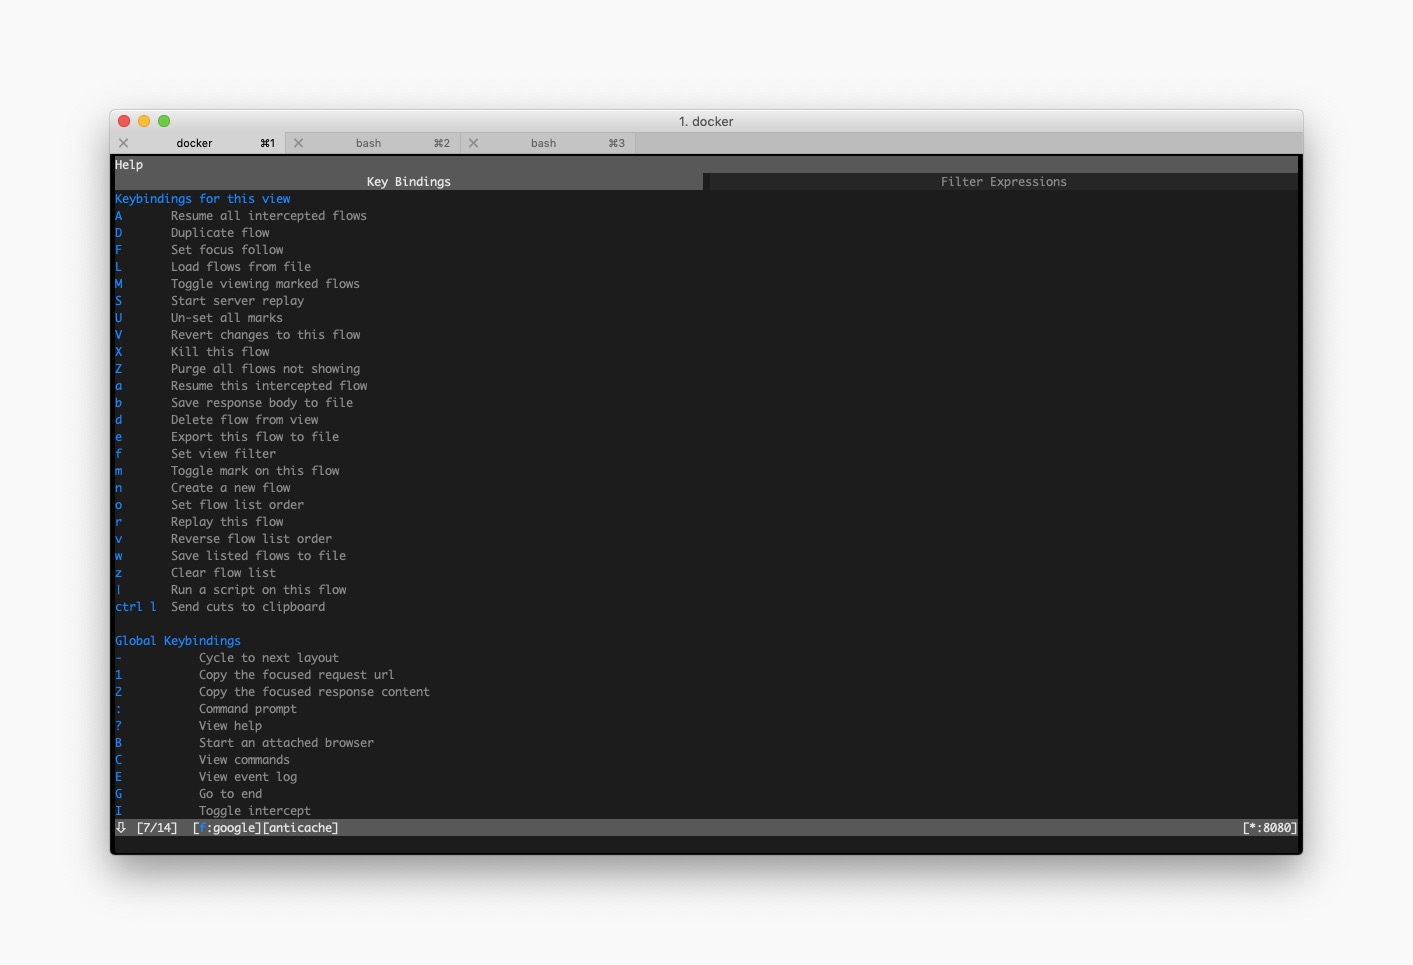
mitmproxy essential keys
With the several following keys, you should be able to navigate among views and explore possibilities offered by each of them :
- wherever you are, use q to go the previous screen
- the escape key allows you to cancel any ongoing modification
- to open the options view, use O
- you can use ? on any view to see global and view-specific keybindings
Filter requests
You will quickly notice that your phone or tablet constantly sends and receives a lot of data even when you are not actively using it. That is why filtering is necessary when you want to follow requests done for a specific purpose.
mitmproxy allows you to filter requests using regexes. To change the filter, simply hit f when you are on the table view.
To display all requests from google.com you must use :
set view_filter=google\.com
To display 404 errors from google.com you must use :
set view_filter=google\.com ~c 404
Intercept requests
The same regexes can also be used as “intercept filters” : this feature allows you to put on hold some requests.
Imagine your app crashes when arriving on a specific screen. You notice that 3 different endpoints are called to load this screen’s content and suspect one of the responses to make your app crash.
With the intercept filter you can block the 3 requests and then authorize each one of them individualy : this way you can see which one makes you app crash.
- use the i key to set an “intercept filter”
- when a request is intercepted, select it and press a to let it go
- when the response arrives, it will also be on hold : press a to let it pass
Ignore domains
You might discover at some point that few apps use certificate pinning to prevent reverse-engineering.
A famous example is the AppStore : if you try to open the app while using mitmproxy, all requests will be rejected and you won’t see any traffic.
Now imagine that you need to test deferred deep linking for an iOS app : you open a deeplink, reach the store, download the app and open it.
Without the --ignore-hosts parameter, requests from the Appstore app would be blocked. To ignore requests from the store and see others you must use :
mitmproxy --ignore-hosts '(apple\.com|mzstatic\.com):443'
Another convenient use case if when you want to totally bypass mitmproxy without modifying the proxy settings on the device. In this case, use ':' to ignore all domains :
mitmproxy --ignore-hosts ':'
Export requests
To reproduce a bug, it is generally useful to export requests to share them with another team for example. mitmproxy allows you to export requests using the e key.
After selecting the export format (cURL, httpie or raw), you need to enter the export path. If you directly installed the software on you computer, just use any local path.
If you use mitmproxy through Docker, then you must use a shared folder. For example, the one you use for certificates :
: export.file curl @focus /home/mitmproxy/.mitmproxy/request.curl
To go further
With the few tips from this post, you should already be able to do a lot of things. If you want to go further, you can have a look at mitmproxy’s documentation and at the following posts :