Creating scripts for mitmproxy
Now that we covered the first steps to get started with mitmproxy (here and here), I would like to develop a bit more one of the best features the tool has to offer : the ability to run Python scripts.
While writting addons is purely optional, automating requests (or responses) editing with custom scripts considerably extends the boundaries of mitmproxy. Through this post, we will see a few concrete examples of how you can use addons to test apps.
If you already managed to set everything in order to run the program and catch requests, writting scripts should not be too complicated for you. Feel free to re-use and alter the examples provided in this post in order to create your own scripts.
Writting and executing scripts
As I mentioned earlier, scripts for mitmproxy must be written using the Python programming language. The Python syntax is not particularly complicated and if you already used any object-oriented programming language then you should be fine.
One advice though : pay attention to indentation! Python is an indent-sensitive language which means that it uses leading whitespaces (instead of curly-brackets {}) in order to compute the indentation level of the line.
Example
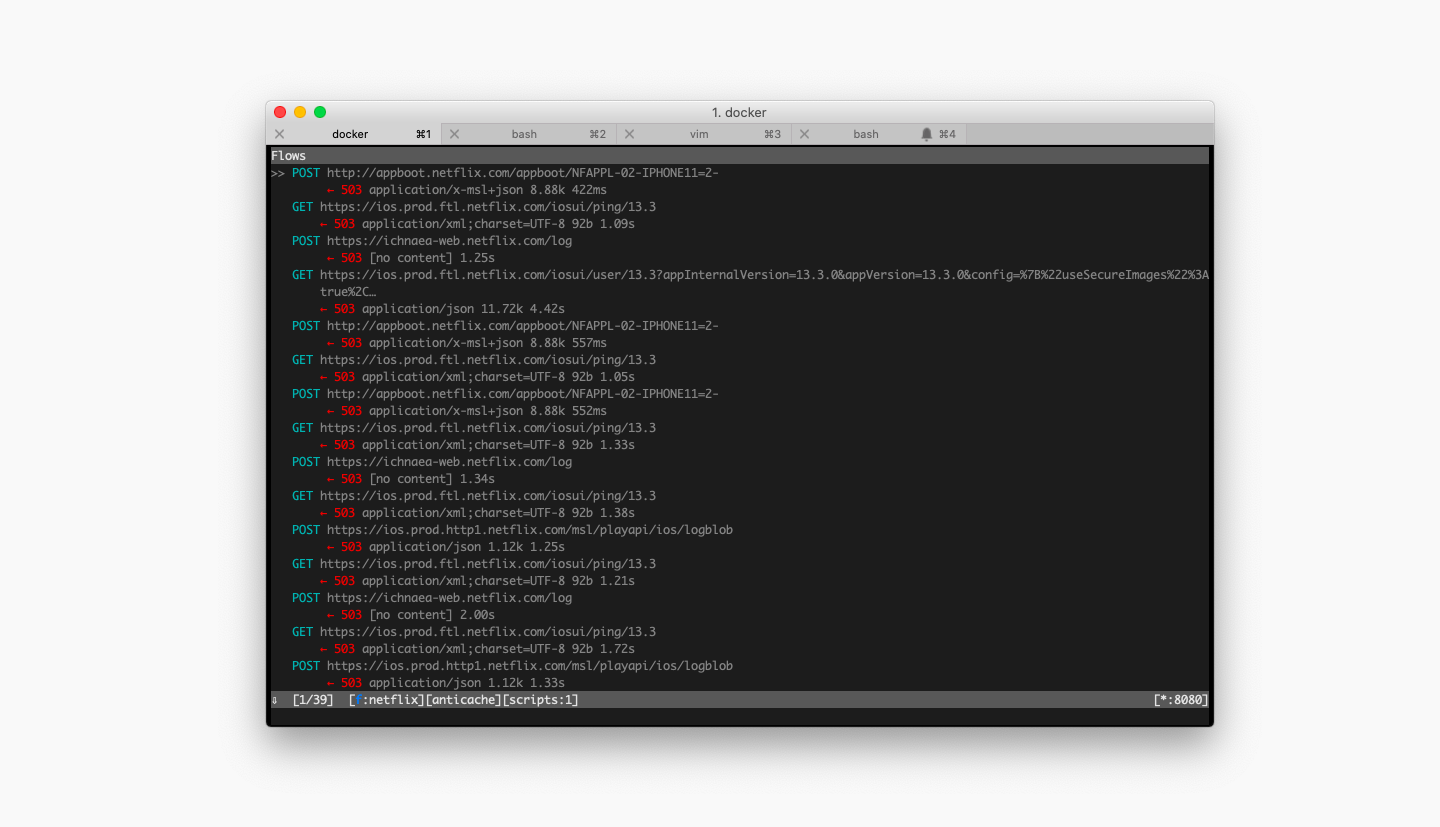
As the best way to learn is often to see an example, here is a simple one. This script will change the HTTP code of any response which’s url matches the filter param.
from mitmproxy import http
from mitmproxy import ctx

class ChangeHTTPCode:
    filter = "netflix.com"

    def response(self, flow: http.HTTPFlow) -> None:
        if (self.filter in flow.request.pretty_url):
            flow.response.status_code = 503

addons = [ChangeHTTPCode()]
To execute the addon, just save it in a file named myscript.py and execute the following command :
mitmproxy -s ./myscript.py
Now if you try to start the Netflix app with a device set to use mitmproxy, all requests will appear as errors : well done, you just forced the app to show its error screen!
Events
In the previous example, we used the response event in order to alter the response before it reaches the device. mitmproxy allows developers to access to multiple HTTP, TCP, WebSocket or generic events.
The full list of supported events is available in the mitmproxy documentation but let’s have a look at several handy ones.
load()is triggered when you launch mitmproxy, it is very convenient if you need to adapt the tool’s settings to run your script
def load(self, loader):
    ctx.options.http2 = False
request()is triggered before the request is sent, the perfect moment to override an user-token for example
def request(self, flow: http.HTTPFlow) -> None:
    flow.request.headers["authorization"] = "Bearer NEWUSERTOKEN"
response()is triggered before the response reaches the device, the right moment to override the response content for example
def response(self, flow: http.HTTPFlow) -> None:
    flow.response.content = "custom response content"
The request and response objects
Both request and response objects are part of the http.HTTPFlow variable passed as a parameter to all HTTP events.
Editing the request (or response) is quite simple as long as you have hints about the object structure : my best advice here is to directly have a look at the project Github repository and check the classes.
- Here are a few essential attributes from the request object :
self.method = method
self.host = host
self.port = port
self.path = path
self.headers = headers
self.content = content
💡 It is also possible to use the self.url property/setter to update the full url
- Here are a few essential attributes from the response object :
self.status_code = status_code
self.headers = headers
self.content = content
💡 You can also use the self.reason property to get the reason phrase corresponding to the status code (ex : “Not found” for a 404 error)
Sending logs
The console can be very useful when you are developing new scripts : to open the console, hit E from the main screen.
To send logs from a script, you can use the following function :
ctx.log.info("Hello world")
Make sure to use a level of verbosity (debug,alert, info, warn and error) high-enough to see you logs. mitmproxy’s default level of verbosity is info.
Using scripts to debug apps
Now that we have seen the main events and objects structure, let’s see a few concrete examples where you can use scripts to debug apps.
Redirecting requests to another environment
This first case is pretty common : you have an app that gets data from an API. The next version of your API is available on the preprod environment and you would like to test it using the exact same build that the one available on Google Play (or on the Appstore).
Of course, the store build of your app is configured to send requests to your prod env and no debug setting is accessible.
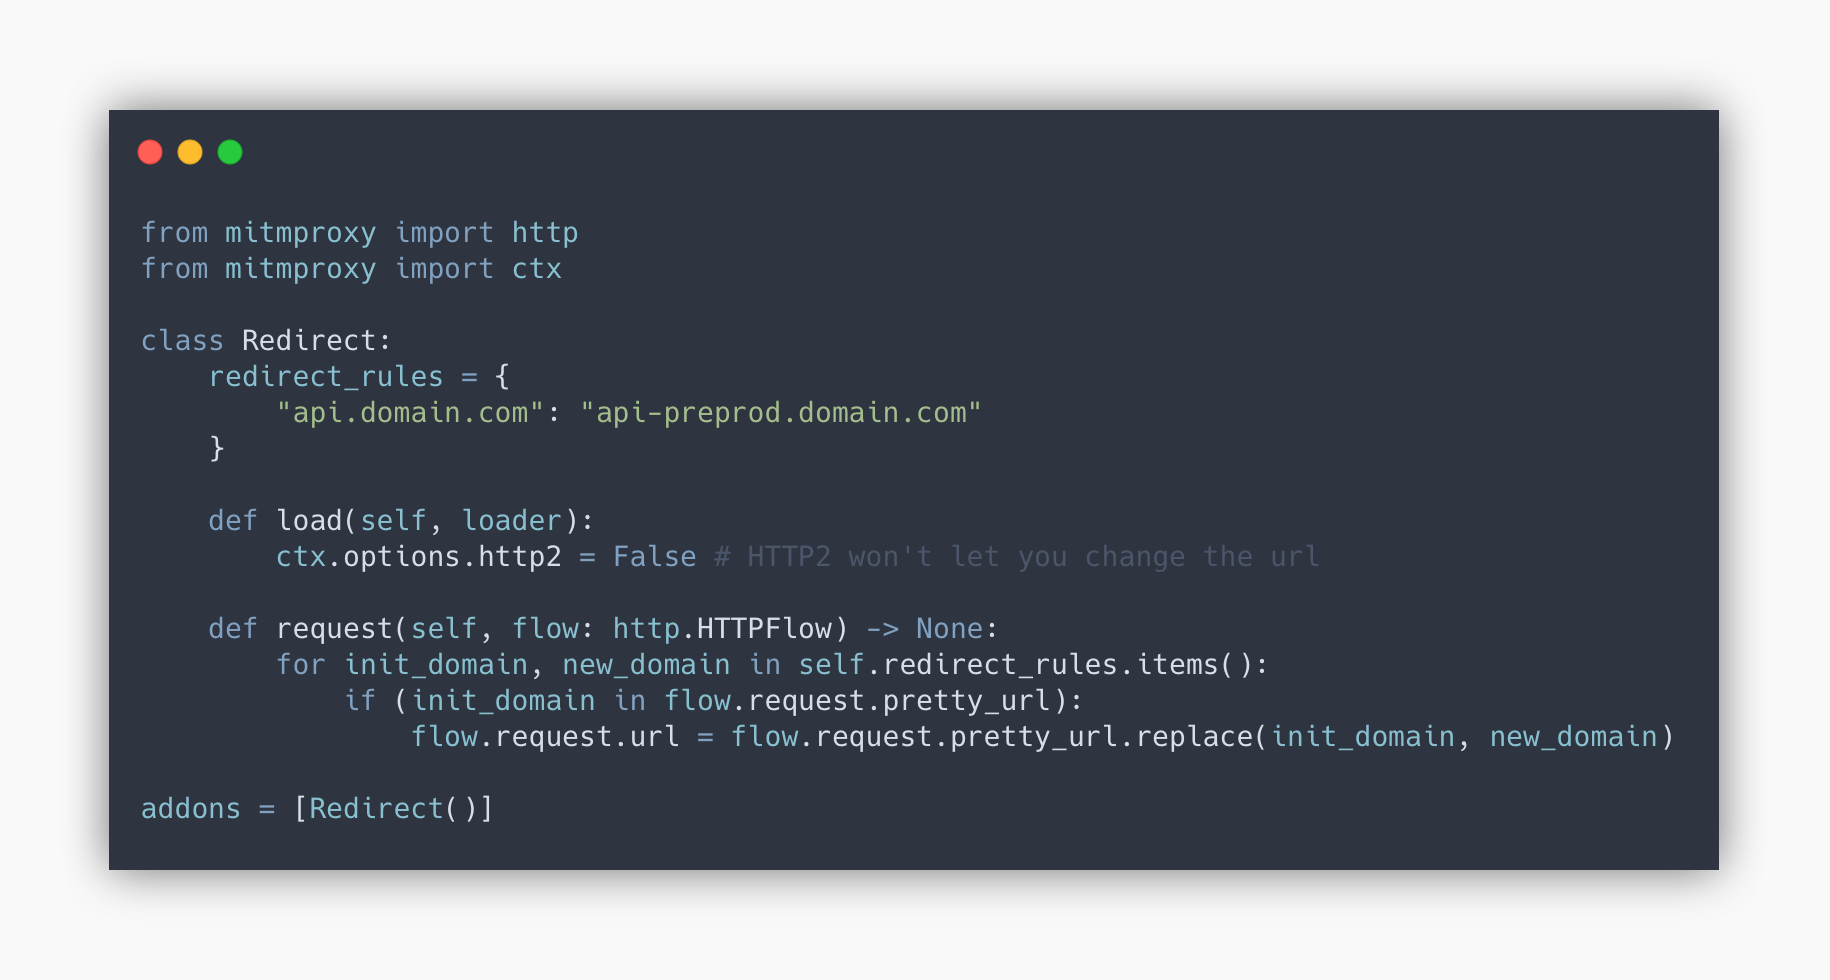
Here, we will intercept requests intended to the prod environment and re-route them to the preprod server using the following script :
from mitmproxy import http
from mitmproxy import ctx

class Redirect:
    redirect_rules = {
        "api.domain.com": "api-preprod.domain.com"
    }

    def load(self, loader):
        ctx.options.http2 = False # HTTP2 won't let you change the url

    def request(self, flow: http.HTTPFlow) -> None:
        for init_domain, new_domain in self.redirect_rules.items():
            if (init_domain in flow.request.pretty_url):
                flow.request.url = flow.request.pretty_url.replace(init_domain, new_domain)

addons = [Redirect()]
About this example :
- you can add multiple redirect rules in the
redirect_rulesobject - we use a simple “replace” function to update the url so you can replace the domain or any other part of the string
- since you cannot change requests url when using HTTP/2, we force the use of HTTP on launch
Use a special user-agent for testing
Now imagine that you are debugging an API and that you need to easily find the logs produced by your device among all production logs.
The simplest way to achieve this is to use a custom user-agent. Fortunately, doing this is straightforward with the following script :
from mitmproxy import http
from mitmproxy import ctx

class ChangeUserAgent:
    user_agent = "my-custom-user-agent"

    def request(self, flow: http.HTTPFlow) -> None:
        flow.request.headers["user-agent"] = self.user_agent

addons = [ChangeUserAgent()]
About this example :
- using the
flow.request.headersarray you can update any header value (authorization,accept-language, …)
Create an editable cache for API responses
For this last example, imagine you need to test how an app behaves when it receives a specific response after sending a request.
Wouldn’t it be great to be able to save requests locally in order to edit them manually ? That is exactly what the following script allows you to do.
The code from this one is far from being perfect but it does the job quite well :
from mitmproxy import http
from mitmproxy import ctx
import os

class EditableCache:
    url_filter = "www.only-redirect-requests-from-this-domain.com"
    path = "/Full/path/to/cache/folder"

    def response(self, flow: http.HTTPFlow) -> None:
        if (self.url_filter in flow.request.pretty_url):
            fullpath = self.path + "/" + self.clean_url(flow.request.url)
            if not os.path.isfile(fullpath):
                if not os.path.exists(os.path.dirname(fullpath)):
                    os.makedirs(os.path.dirname(fullpath))
                file = open(fullpath, "w")
                file.write(flow.response.text)
                file.close()

    def request(self, flow: http.HTTPFlow) -> None:
        if (self.url_filter in flow.request.pretty_url):
            fullpath = self.path + "/" + self.clean_url(flow.request.url)
            if os.path.isfile(fullpath):
                with open(fullpath, 'r') as cache_file:
                    cache_content = cache_file.read()
                flow.response = http.HTTPResponse.make(200,cache_content)

    def clean_url(self, url):
        filename = url
        filename = filename.replace("https://", "")
        filename = filename.replace("?", "_")
        filename = filename.replace(",", "-")
        return filename

addons = [EditableCache()]
About this example :
- the
url_filterparam allows you to only save some of the requests that pass through mitmproxy - the
pathparam is the local folder where you want to save responses
I hope this post will inspire some of you to create their own mitmproxy scripts. You can find more examples on my mitmproxy-helpers Github repository. Don’t hesitate to fork this repo and to suggest improvements!
Other posts about mitmproxy
If you want to learn more about mitmproxy, don’t hesitate to check my other posts about this topic :